Replacing windows in an older home can be an exciting, yet challenging task. Beyond aesthetic benefits, new windows can improve energy efficiency, enhance comfort, and increase property value. However, older homes come with unique considerations that need to be addressed carefully. Below are six essential factors homeowners should evaluate before embarking on a window replacement project.
1. Preservation of Historical Charm
- Opt for customized window designs that match the original aesthetics.
- Consider materials like wood or composite that resemble traditional frames.
- Check if your home is located in a historic district where specific guidelines may dictate window styles and materials.
2. Energy Efficiency Upgrades
- Double-glazed or triple-glazed windows for improved insulation.
- Low-E (low emissivity) coatings to minimize heat transfer.
- Frames made from insulated materials like vinyl or fiberglass.
For long-term savings on heating and cooling costs, look for windows certified by ENERGY STAR®.
3. Structural Integrity of Window Frames
- Rotting or deteriorated wooden frames.
- Cracks in masonry or gaps around the window opening.
- Out-of-square openings caused by settling over time.
Repairing these issues prior to installation ensures a secure fit and prevents future problems such as drafts or leaks.
4. Proper Measurements
| Measurement Considerations | Why It’s Important |
| Width & Height | Ensures proper sizing of the window unit |
| Diagonal Measurements | Checks if the frame is square |
| Depth | Confirms compatibility with wall thickness |
Having professional installers take precise measurements can prevent costly errors during installation.
5. Ventilation Needs
- Determine which rooms need better air circulation.
- Choose operable window types like casement or double-hung styles for better functionality.
- Ensure compliance with local building codes regarding egress requirements in bedrooms or basements.
6. Budget Considerations
- Request estimates from multiple contractors for comparison.
- Balance cost against longevity; investing in high-quality materials can reduce maintenance expenses over time.
- Look into available rebates or tax credits for installing energy-efficient products.
By addressing these six factors thoughtfully, homeowners can ensure their window replacement project enhances both the functionality and beauty of their older home while aligning with modern standards of efficiency and comfort.
Important Safety Tips for Window Replacement Rockville, MD Homeowners Need to Know
Proper window installation requires meticulous planning and attention to safety. Neglecting safety measures can lead to injuries, property damage, or suboptimal results. Below are some essential safety tips to consider before, during, and after installing windows.
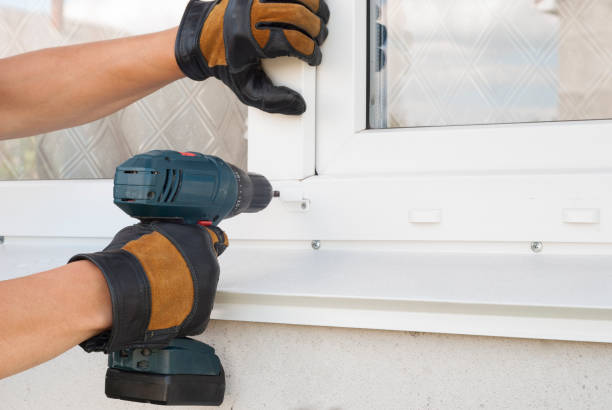
Wear the Right Protective Gear for Window Installation Rockville, MD
- Safety gloves: To protect hands from sharp edges of glass or frames.
- Safety goggles: To shield your eyes from dust, debris, or accidental impact.
- Steel-toe boots: To safeguard your feet in case heavy materials are dropped.
- Dust mask: For protection against inhaling particles when cutting or sanding frames.
Ensure Proper Handling of Glass for Replacement Windows Rockville, MD
- Always carry glass vertically rather than flat to reduce stress on the pane.
- Use suction grips or specialized lifting tools for better control.
- Inspect each pane for cracks or defects before installation.
Securing the Work Area During Window Repair Rockville, MD
- Remove furniture, rugs, and other obstructions near windows.
- Place warning signs if working in a high-traffic area.
- Sweep away debris regularly to prevent slipping.
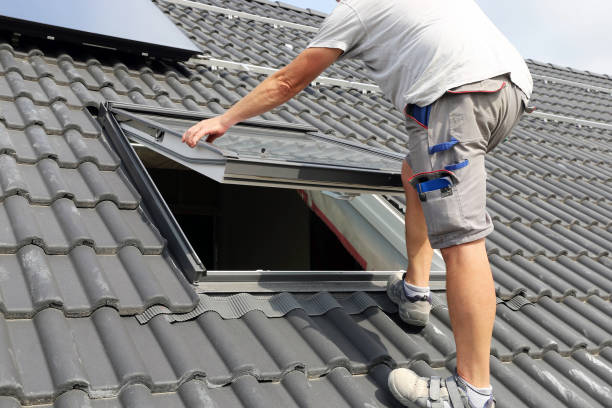
Additionally, use sturdy ladders or scaffolding for access to elevated areas and ensure they are stable before climbing.
Important Tips for Safe Window Glass Replacement Rockville, MD
- Read the instruction manuals for all power tools prior to use.
- Keep tools sharp and well-maintained; dull blades increase risk of accidents.
- Always cut away from your body when trimming materials like caulk or wood.
Address Weather Conditions
| Weather Condition | Potential Risk | Recommended Action |
| High winds | Glass breakage; tool instability | Postpone installation until conditions stabilize |
| Rain | Slippery surfaces | Use non-slip mats; wear waterproof gear |
| Extreme heat | Dehydration | Take regular breaks; stay hydrated |
Working in unfavorable weather can compromise not only safety but also the quality of the installation.
6. Protect Against Falls
- Use harnesses if required by local building codes.
- Install guardrails on scaffolds.
- Never overreach while standing on ladders—move it instead.
Falls are among the most common injuries during construction projects but are entirely preventable with proper precautions.
Final Checklist Before Starting Work
- Have you inspected all materials for damage?
- Are all necessary permits secured (if applicable)?
- Is your team familiar with emergency protocols?
- Are worksite hazards minimized?
By following these essential safety tips throughout the process, you’ll ensure not only a successful window replacement but also a safe experience for everyone involved in the project.
The Importance of Properly Sealing Windows for Energy Efficiency and Longevity
Properly sealing windows is an essential step in any window installation process. Not only does it ensure that your windows function correctly, but it also enhances energy efficiency and prolongs the lifespan of both the windows and your home. Failing to prioritize sealing can lead to air leaks, water damage, higher utility bills, and a less comfortable living environment. Here’s a detailed look at why sealing your windows matters and how to do it right.
Benefits of Proper Window Sealing
- Sealing prevents air leaks around the edges of your windows, reducing drafts.
- Well-sealed windows help maintain consistent indoor temperatures, lowering heating and cooling costs.
- Energy-efficient homes contribute to reduced carbon footprints.
- Eliminates cold spots during winter by blocking outdoor air infiltration.
- Reduces heat gain in summer months when paired with appropriate glass types.
- A properly sealed window keeps rainwater from seeping into walls or flooring.
- Preventing moisture intrusion reduces the chances of mold growth or structural deterioration.
- Frames are protected from weather-related wear-and-tear when sealed effectively.
- Prolongs the life of caulking and insulation materials used around window openings.
Common Signs Your Windows Are Poorly Sealed
- Noticeable drafts around window edges.
- Increased energy bills without significant changes in household habits.
- Condensation between glass panes or along the interior sides of windows.
- Peeling paint or soft wooden frames near window areas caused by water damage.
Steps for Properly Sealing Windows
- Look for gaps, cracks, or warping that may compromise the seal’s effectiveness.
- Repair any frame damage before proceeding with sealing.
- Choose High-Quality Sealants | Type | Best For | Pros | Cons | |——|———-|——|——| | Silicone Caulk | Outdoor use; glass-to-frame seals | Highly weather-resistant; long-lasting | Harder to apply | | Acrylic Latex Caulk | Interior use; small cracks/gaps | Easy to use; paintable surface after drying | Less durable outdoors |
- Use a damp cloth or cleaning solution to remove dirt, dust, or grease on surfaces where sealant will be applied.
- Allow surfaces to dry completely for better adhesion.
- Use a caulking gun for even application along window edges.
- Smooth out excess caulk using a caulking tool or your finger for neat results.
- Test for Effectiveness Post-Sealing After curing (typically 24–48 hours), check for leaks using:
- A lit candle near sealed areas (flickering indicates air movement).
- Infrared thermometers to identify cold spots in winter months.
Maintenance Tips for Long-Term Performance
- Inspect seals annually for wear-and-tear such as cracking or peeling.
- Reapply sealant as needed — especially after severe weather like heavy rains or extreme temperature fluctuations.
- Check weatherstripping around operable windows regularly and replace damaged sections promptly.
Investing time into properly sealing your home’s windows not only enhances their performance but also delivers measurable savings on energy costs over time. By following best practices during installation and performing regular maintenance checks, you can enjoy added comfort in every season while protecting your home’s structural integrity over the years ahead—making this step an integral part of any successful project involving new window installations or replacements.
Upgrading Your Home with High-Quality, Better Windows for Superior Performance
Investing in high-quality windows is a significant step toward improving your home’s overall comfort, energy efficiency, and aesthetic appeal. The right windows can elevate the functionality of your home while offering long-term savings. Below, we’ll explore how upgrading to better windows can enhance your living space and provide factors to consider when selecting the best options for your needs.
Benefits of High-Quality Windows
- Improved Energy Efficiency:
High-performance windows are designed to reduce heat transfer and improve insulation. Look for features such as double or triple glazing and low-E (low-emissivity) coatings. - Enhanced Curb Appeal:
Upgraded windows can transform the exterior aesthetic of your home with modern designs, materials, and finishes. - Noise Reduction:
Premium-grade windows often feature soundproofing technology that minimizes outdoor noise for a quieter indoor environment. - Increased Home Value:
Replacing old or inefficient windows with high-quality options may boost the resale value of your property. - Durability and Longevity:
Quality materials like fiberglass or vinyl ensure that windows resist weathering over time.
Features to Look for in Superior Windows
| Feature | Description | Benefit |
| Energy Efficiency Rating | Look for ENERGY STAR certified products with a low U-factor and SHGC (solar heat gain coefficient). | Reduced energy bills |
| Frame Material | Choose durable materials such as vinyl, wood-clad, or fiberglass that suit your climate. | Longer lifespan |
| Glazing Options | Opt for double or triple panes with inert gas fills like argon or krypton between layers. | Better insulation |
| Low-E Coating | This invisible layer reflects infrared light while allowing visible light into the home. | Keeps interiors comfortable |
| Weatherstripping & Seals | Ensure tight seals around frames that prevent air leaks and moisture infiltration. | Improved durability |
Tips for Choosing Windows That Match Your Home’s Style
- For traditional homes (e.g., Victorian or Colonial styles), consider double-hung or casement windows with wood frames.
- Modern properties often benefit from sleek aluminum-framed picture or sliding glass windows.
- For rustic homes like farmhouses, choose grid-style patterns on larger panes to maintain charm while enjoying better views.
Cost vs Value: Is It Worth It?
- Lower utility costs due to improved thermal efficiency
- Reduced maintenance thanks to advanced materials
- Fewer replacements needed over time
Although premium options require an upfront investment, their ability to provide superior performance makes them an excellent choice for homeowners seeking long-term value.
By upgrading to high-quality modern windows tailored to both style and function, you can enjoy a more comfortable living environment while ensuring durability and future energy savings.
Steps to Prepare Your Window Frame for a Seamless Replacement Process
Properly preparing your window frame is essential for ensuring a successful and seamless window replacement process. Without adequate preparation, you might face issues such as improper fitting, air leaks, or reduced energy efficiency. Here’s a detailed guide on the steps to get your window frame ready for replacement.
1. Assess the Existing Window Frame
Before starting any work, inspect the current state of your window frame. Look for:
– Rot or Damage: Wooden frames may have rotted sections that need repair or replacement.
– Warping: Ensure that the frame is not warped or misaligned. A crooked frame can make proper installation difficult.
– Pest Damage: Check for signs of termites or other pests that could compromise the structure’s integrity.
If any significant issues are identified, repair or replace the damaged areas before moving forward.
2. Remove Old Windows and Residual Materials
Carefully remove the old windowpane and components to avoid damaging the surrounding structure. This includes:
– Window Sash and Panes: Detach these with care to minimize breakage risks.
– Old Caulking or Sealant: Use a scraper tool to remove old adhesive materials around the edges of the frame. – Debris Build-up: Clean out dirt, dust, and debris from within and around the frame area.
Use drop cloths around your work area to collect debris and prevent unnecessary mess.
3. Measure Accurately for Replacement Windows
Accurate measurements are critical when preparing your frame for new windows to ensure a perfect fit. Follow these steps: – Measure both height and width at three points (top, middle, bottom). – Use the smallest measurement as your base dimension. – Verify diagonal measurements to ensure that the opening is square.
| Measurement | Dimension (inches) |
| Width | X |
| Height | X |
| Diagonal | X |
4. Inspect Insulation Around The Frame
Old insulation can compromise energy efficiency if left unaddressed during window installation. Carefully remove outdated or crumbling insulation materials from around the opening.
For re-insulating after prep: – Use spray foam insulation around gaps. – Ensure it doesn’t expand excessively, which might affect window alignment.
5. Sand Down Imperfections on Wooden Frames
If you’re working with wooden frames, sanding down rough spots ensures smooth installation: – Start with medium-grit sandpaper (80–120 grit).
– Finish with fine-grit sandpaper (200+ grit) for smoothness. Clean off dust before proceeding further—this helps new sealants adhere better during installation.
6. Install Flashing Tape (If Needed)
Flashing tape acts as an additional protective barrier against water infiltration: 1. Apply self-adhering flashing tape along all four sides of your exterior sill where new windows will sit. 2. Overlap corners slightly so there are no gaps in coverage. 3. Press down firmly using a roller tool or hand pressure for maximum adhesion.
This step is especially critical in areas prone to heavy rain or humidity as it prevents moisture-related damage over time.
Key Tips For Success
To ensure smooth preparation: 1. Work systematically—completing one step fully before moving onto another. 2. Keep tools like pry bars, scrapers, measuring tape, levelers handy at all times. 3. Double-check dimensions twice before ordering custom windows if replacements aren’t standard sizes.
By following these preparation steps thoroughly, your project will run more efficiently while avoiding costly mistakes during installation itself.
Why Choosing Certified Professional Installers Ensures a Successful Window Installation
When it comes to replacing or installing new windows, hiring certified professional installers is one of the most critical decisions a homeowner can make. Proper installation directly impacts the performance, durability, and energy efficiency of your windows. Below, we’ll explore the reasons why certified professionals are essential for ensuring a smooth and successful window installation process.
Expertise and Knowledge
- Material Compatibility: Understanding which materials work best with your home’s structure.
- Building Codes: Adhering to local building codes and regulations to ensure compliance.
- Advanced Install Techniques: Implementing advanced methods that maximize efficiency and minimize potential issues like air leaks or water damage.
Their specialized knowledge reduces the risk of costly errors, saving you time and money in the long term.
Proper Tools and Equipment
- Precisely measure window openings for a custom fit
- Securely install frames without damaging surrounding materials
- Ensure proper sealing techniques for improved energy efficiency
A lack of proper tools often results in subpar installations, leading to premature wear or reduced functionality.
Warranty Protection
- Protect your investment with manufacturer-backed guarantees.
- Gain peace of mind knowing that workmanship warranties may also cover labor-related issues.
Attempting DIY installation without certification can void these warranties, leaving you liable for potential repair costs.
Enhanced Safety Standards
- Using protective gear during the installation process
- Securing windows properly to avoid accidents
- Handling heavy materials without compromising structural integrity
These precautions help safeguard both your property and the workers involved.
Time Efficiency
- Uneven window frames
- Hidden structural issues (e.g., rot or mold)
- Custom-shaped or oversized windows
By delegating this task to experts, homeowners save hours—or even days—on what could be an overwhelming DIY project.
Cost-effective Results
| Impact of Professional Installation | Cost-Saving Advantages |
| Energy-efficient seals | Lower monthly utility bills |
| Reduced need for repairs | Avoiding repeat service calls |
| Longevity of windows | Delayed need for future replacements |
These long-term savings make professional installation a more economical choice over time.
Customized Recommendations
- The best window styles to suit your home’s design
- Insulation improvements for better energy performance
- Solutions for homes in extreme climates (e.g., double-glazed glass or UV-resistant coatings)
This level of customization ensures both aesthetic appeal and functional benefits tailored specifically to your needs.
Choosing certified professional installers ensures that every aspect of your window replacement project—from preparation through final adjustments—meets industry standards. This decision ultimately enhances quality, safety, efficiency, and overall satisfaction with your new windows’ performance over time.

How to Protect Your Home by Boarding Up Windows Before Installation Projects
When preparing for a window installation project, protecting your home is essential to avoid potential damage and ensure a smooth process. One crucial step is boarding up your windows before the installation begins. This task not only safeguards your property but also protects the interior of your home from weather conditions, debris, and security risks. Below is a guide on how and why to board up windows effectively before starting an installation project.
Why Boarding Up Windows Is Necessary
- Weather Protection: Open or exposed window spaces can allow rain, wind, or extreme temperatures to enter your home during the installation process.
- Debris Prevention: During construction or renovation, dust and debris can easily infiltrate open areas if they aren’t properly secured.
- Enhanced Security: Boarding up windows prevents unauthorized access to your property while openings are exposed.
- Safety Precautions: It minimizes risks of accidents caused by broken glass or other hazards.
Tools and Materials Needed
To board up your windows effectively, you’ll need the following materials: – Plywood sheets (preferably ½ inch thick) – Measuring tape – Saw for cutting plywood – Drill or hammer – Screws or nails – Safety goggles – Ladder (if necessary)
Investing in good-quality materials ensures durability throughout the project.
| Tool/Material | Purpose |
| Plywood sheets | Covers and protects window openings |
| Measuring tape | Ensures precise measurements |
| Drill/hammer | Secures plywood in place |
| Screws/nails | Fastens plywood securely |
Step-by-Step Guide to Boarding Up Windows
- Measure the Window Openings Use a measuring tape to determine the dimensions of each window that will be replaced. Add an additional inch on all sides to ensure full coverage when cutting plywood.
- Cut Plywood Sheets Using these measurements, cut plywood sheets accordingly with a saw. Be sure each sheet fits neatly over its respective window opening.
- Attach Plywood Securely Position the plywood against the exterior frame of each window opening and secure it with screws or nails using a drill or hammer.
- Inspect for Gaps Check for gaps between the edges of the plywood and the wall frame where air, water, or pests could enter. If gaps exist, use weather-resistant sealant to close them temporarily.
- Reinforce Larger Windows For larger openings such as patio doors or picture windows, consider additional reinforcement by adding horizontal wooden braces across the board’s surface for extra stability.
Tips for Success
- Always wear safety goggles when cutting wood or drilling.
- Work with a partner if ladder use is required.
- Label each piece of plywood after cutting so you know which piece corresponds to which opening.
- Avoid using adhesive tapes as they may leave residue on surfaces after removal.
After Installation
Once your new windows are installed successfully, remove any boards carefully without damaging surrounding structures. Store reusable materials such as screws and wood panels for future projects if they remain in good condition.
By boarding up your windows before starting an installation project, you take proactive steps toward ensuring safety while protecting structural elements of your home from unwanted exposure or damage during renovations.
Allowing the Glazing Process to Fully Dry: A Crucial Step in Window Installation
When it comes to window installation, ensuring that every step is completed with precision can significantly impact the functionality and longevity of your windows. One often-overlooked yet essential phase of the process is allowing the glazing to fully dry. Proper drying of the glazing not only ensures a clean and secure seal but also prevents future problems such as leaks, drafts, or moisture damage. Below, we’ll break down why this step is crucial and what you can do to ensure optimal results.
What Is Window Glazing?
Glazing refers to the application of a specialized compound or material used to seal and secure glass panes into their frames. This compound forms a barrier that minimizes air and moisture infiltration while enhancing durability. Whether you’re replacing old windows or installing new ones, glazing plays a critical role in achieving a long-lasting bond between the glass and frame.
Why Is Allowing Glazing to Fully Dry Important?
- Compromised Seal Integrity: If not allowed sufficient time to cure, glazing may fail to adhere properly, leaving gaps for air or water intrusion.
- Moisture Problems: Improperly dried glazing can result in water seepage over time, leading to rot or mold around your windows.
- Reduced Energy Efficiency: Without a proper seal, your windows may allow drafts that increase heating and cooling costs.
- Shortened Lifespan: Poorly dried glazing may crack or deteriorate prematurely, requiring frequent repairs or replacements.
Factors That Affect Drying Time
- Oil-based compounds typically take longer (7-14 days) due to their dense consistency.
- Latex-based formulas dry faster (24-48 hours) but may sacrifice some durability.
- Warm temperatures and low humidity promote faster drying.
- Cold or damp conditions slow curing times significantly.
- Thicker layers require more time for complete drying compared to thinner applications.
- Adequate airflow helps speed up curing by allowing moisture from the compound to evaporate more efficiently.
Best Practices for Allowing Proper Drying
- Schedule Around Weather Conditions Choose mild days with moderate humidity levels for optimal results when applying glazing outdoors.
- Apply Thin Layers Avoid overloading compounds during application; instead, use even and thin layers for quicker drying times.
- Ensure Proper Ventilation Keep work areas well ventilated by opening nearby doors or windows if working indoors.
- Avoid Handling Prematurely Refrain from touching or testing the glaze until you’re certain it has cured fully according to manufacturer guidelines.
Table: Typical Drying Times for Different Glazing Types
| Type of Glazing | Approximate Drying Time | Ideal Conditions |
| Oil-Based | 7–14 Days | Warm temperatures; low humidity |
| Latex-Based | 24–48 Hours | Moderate temps; proper air circulation |
Allowing sufficient time for your window glazing compound to dry completely might seem like an inconvenience initially but will save you from costly repairs down the line. By ensuring this critical step is handled correctly, you’re investing in energy-efficient and durable windows that will serve your home well for years ahead.
- Step-by-Step Guide to Window Replacement Rockville, MD Homeowners Can Trust
- 6 Essential Things to Consider Before Window Installation Rockville, MD
- Expert Tips for Window Installation Rockville, MD: Reputation and Experience Matter
- Essential Factors to Consider When Replacing Windows in Rockville, MD Homes
- Choosing Windows Rockville, MD: DIY vs Professional Installation for the Best Results
- Identifying a Broken Window Seal and Replacement Options for Windows Rockville, MD
- Understanding Window Replacement in Rockville, MD: Full vs. Glass Only