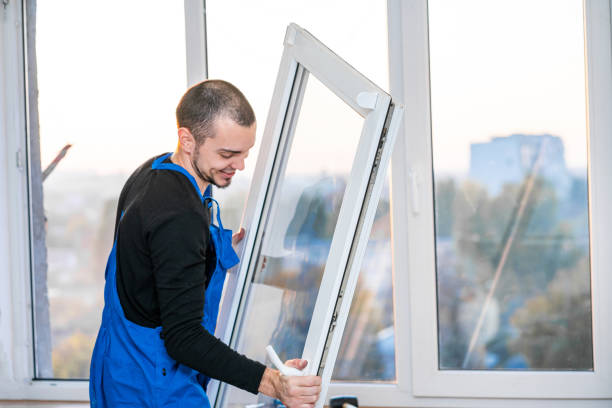
6 Essential Things to Consider Before Window Installation Rockville, MD

Caucasian man installs fittings for a window frame. Young caucasian man installs metal fittings for plastic window frame with a drill, tightening a screw in a room where renovations are taking place, close-up side view with selective focus. The concept of home renovation, washing window frames. window installation stock pictures, royalty-free photos & images

Replacing windows in your home is a significant investment that can enhance both the aesthetics and functionality of your living space. However, before moving forward with a window replacement project, it’s important to carefully evaluate several key factors to ensure the best outcome. Below are six essential considerations homeowners should keep in mind.

1. Assess Your Budget

Understanding how much you’re willing and able to spend is a critical first step. Window replacement costs can vary significantly depending on the type, size, material, and number of windows being replaced.

  • Cost Breakdown:
    | Component | Estimated Percentage of Cost |
    |————————-|—————————–|
    | Materials (windows) | 50% |
    | Installation labor | 30% |
    | Additional expenses* | 20% |

*Additional expenses may include permits, disposal fees, and repairs to surrounding structures.

To avoid overspending, request multiple quotes from reputable contractors and compare pricing for different window options.

2. Energy Efficiency

  • Low-E (low emissivity) glass: Reduces heat transfer while allowing natural light into your home.
  • Double or triple glazing: Provides better insulation by trapping air between multiple panes of glass.
  • Gas fills (e.g., argon or krypton): Enhances thermal performance by filling spaces between panes with insulating gas.
  • ENERGY STAR® certification: Ensures compliance with strict energy-efficiency guidelines.

Energy-efficient windows not only lower heating and cooling costs but also contribute to environmental sustainability.

3. Style and Design

  • Double-hung windows: Classic design with two operable sashes for ventilation.
  • Casement windows: Hinged on one side; ideal for hard-to-reach spaces like above kitchen sinks.
  • Sliding windows: Move horizontally along tracks; suitable for wide openings.
  • Bay or bow windows: Project outward from the wall; provide additional seating or space inside.

Take time to envision how each design will look in relation to both your interior decor and exterior curb appeal.

4. Local Climate Conditions

  • In hot climates, opt for Low-E glass coatings that reflect sunlight effectively.
  • In colder regions, prioritize double or triple-pane glass combined with insulated frames to minimize heat loss.

Discuss climate-specific options with an experienced contractor who understands local weather challenges.

5. Material Choices

Material Pros Cons
Vinyl Affordable, low maintenance Limited color options
Wood Timeless aesthetic appeal Requires regular upkeep
Aluminum Lightweight and durable Less energy-efficient
Fiberglass Excellent insulation & low maintenance Higher upfront cost

Evaluate the long-term durability, maintenance needs, and initial costs when selecting frame materials.

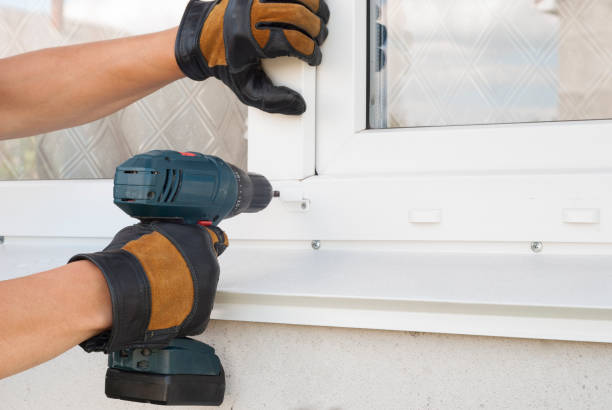
6. Installation Expertise

Even high-quality windows won’t perform well if they’re improperly installed. Hiring certified professionals ensures that the installation process adheres to industry standards while minimizing risks such as air leaks or water infiltration.

Key benefits of professional installation: – Correct measurement and fitment – Proper sealing techniques for weatherproofing – Compliance with local building codes

Ask potential contractors about their certifications (e.g., InstallationMasters™), warranties offered on labor/services provided, and their track record of customer satisfaction.

By considering these six factors before replacing your home’s windows, you’ll be better prepared to make informed decisions that align with your long-term goals—whether improving energy efficiency, enhancing curb appeal, or increasing property value.

Why Certified Professionals Are Essential for Windows Rockville, MD Installation Projects

When it comes to window installation, the expertise and knowledge of certified professionals can mean the difference between a seamless, long-lasting project and one plagued with issues. Homeowners often underestimate the complexities involved in installing or replacing windows, but partnering with qualified professionals ensures that each aspect of the process is handled with precision and care. Below, we’ll cover why certified professionals are essential for window installation projects and how their expertise benefits homeowners.

Expertise and Training for Replacement Windows in Rockville, MD

Certified professionals undergo specialized training to ensure they understand various types of windows, materials, and installation techniques. Their certification verifies that they have met industry standards for quality and safety.

  • Knowledge of Building Codes: Certified installers are familiar with local building codes and regulations related to window installation. This ensures compliance with laws that might otherwise result in fines or structural issues.
  • Advanced Techniques: They stay up-to-date on modern installation practices, including energy-efficient methods and technologies. This expertise translates into better results for your home’s energy efficiency.

Expert Window Repair Services in Rockville, MD

Hiring a certified professional provides peace of mind regarding the quality of workmanship. A proper installation isn’t just about fitting a window into an opening—it involves addressing insulation, weatherproofing, alignment, and other critical factors.

Key quality benefits include:
Precise Measurements: Properly aligned windows prevent drafts, leaks, and unnecessary strain on your HVAC system. – Weatherproofing Expertise: Professionals know how to seal windows effectively to protect against water damage. – Warranty Compliance: Many manufacturers require professional installation for warranties to remain valid.

Feature Professional Installer DIY/Non-Certified Installer
Knowledge of Building Codes Yes Often lacking
Warranty Compliance Guaranteed Typically voided
Energy Efficiency Optimized Inconsistent

Essential Safety Tips for Window Glass Replacement Rockville, MD

Window installations can pose safety risks if not done correctly. Certified professionals prioritize safety at every stage of the process.

  • Proper Tools and Equipment: Professionals use specialized tools designed for precise cutting, sealing, and placement.
  • Risk Mitigation: They’re trained in safe handling practices when dealing with heavy glass panes or working at heights.
  • Structural Integrity Protection: Incorrect installations can compromise the structural integrity of walls around your windows; certified experts avoid such issues.

Cost Efficiency Over Time

While hiring certified experts may seem more expensive upfront than attempting DIY or hiring uncertified laborers, it often saves money in the long run by avoiding costly repairs or replacements caused by poor workmanship.

Long-Term Cost Benefits:

  1. Reduced energy bills due to improved seals and insulation.
  2. Fewer maintenance issues stemming from improper installations.
  3. Increased property value thanks to professional-level craftsmanship.

How to Verify Certification

  1. Ask for certifications from reputable organizations like AAMA (American Architectural Manufacturers Association) or NFRC (National Fenestration Rating Council).
  2. Request proof of insurance coverage to protect against liability during the project.
  3. Check references or read online reviews about their previous work.

By prioritizing experience and skill over cost savings alone, you’ll achieve a safer, more durable outcome for your window installation project—one that enhances both comfort and aesthetics in your home over time.

Experienced installer in uniform automatic screwdriver and repairs plastic door Experienced installer in uniform automatic screwdriver and repairs plastic door window installation stock pictures, royalty-free photos & images

Why Certified Professionals Are Key to a Successful Window Installation Project

When replacing or installing windows in your home, the expertise of the installer plays a critical role in ensuring a successful outcome. Hiring certified professionals is not just about convenience—it directly impacts the functionality, safety, and durability of your windows. Below, we explore why certified experts are essential for a window installation project and how their involvement benefits homeowners.

The Value of Certification

These programs ensure that professionals understand proper installation techniques, building codes, and safety measures specific to different types of windows.

Expertise in Handling Complex Installations

  • Installing large or custom-shaped windows
  • Working with older homes that may require structural adjustments
  • Ensuring compatibility with energy-efficient or high-performance glass options

Their ability to troubleshoot these complexities can save time and prevent costly errors.

Ensuring Compliance with Local Building Codes

  • Ensure legal compliance for projects
  • Avoid fines or penalties related to improper installations
  • Provide documentation needed for inspections or resale purposes

By adhering to local codes, they also enhance the long-term safety of your home.

Benefits of Professional Tools and Techniques

Aspect Benefit
Precision Proper alignment for airtight seals
Safety Reduced risk of glass breakage during handling
Efficiency Faster completion times without sacrificing quality

Additionally, they employ advanced techniques such as thermal breaks and weatherproofing methods that contribute to better insulation and energy efficiency.

Warranty Protection

  1. Documentation proving professional installation
  2. Peace of mind knowing materials are installed according to manufacturer specifications
  3. Assistance with future warranty claims if issues arise

This ensures homeowners won’t face unexpected costs due to voided warranties caused by improper DIY work or hiring unqualified contractors.

Long-Term Savings

  • Reduced likelihood of repairs from improper installation
  • Enhanced energy efficiency lowering utility bills
  • Extended lifespan of properly installed windows

Investing in expertise now can help avoid recurring expenses later.

Hiring certified professionals is not an optional luxury but rather an essential step toward ensuring a safe, durable, and efficient window installation process. Their knowledge, adherence to standards, and use of best practices reduce risks while maximizing value for homeowners over time.

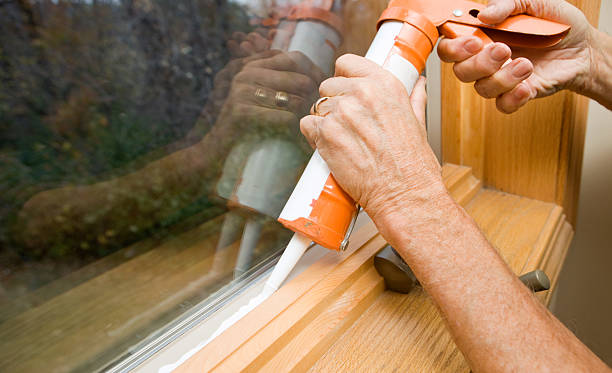
How Proper Adhesives Ensure Safety and Longevity in Window Installation

When installing new windows, many homeowners focus on the design, energy efficiency, and materials involved. However, one often overlooked but critical component of the process is the adhesive used during installation. Proper adhesives are foundational to ensuring both the safety and long-term performance of your windows. Below, we’ll explore how selecting the right adhesive can make all the difference in your window installation project.

The Role of Adhesives in Window Installation

  • Sealing the Window Frame: Proper adhesives create an airtight and watertight seal between the window frame and the surrounding structure. This prevents air leaks, water infiltration, and drafts.
  • Structural Integrity: High-quality adhesives add to a window’s structural stability by securing it firmly within its frame.
  • Thermal Efficiency: By reducing gaps or cracks around the window through effective sealing, adhesives help maintain consistent indoor temperatures and improve energy efficiency.

The failure to use appropriate adhesives can lead to compromised installations that may result in increased energy bills, water damage, or even safety risks over time.

Key Characteristics of Proper Adhesives

  1. Capable of withstanding extreme temperatures (both hot and cold).
  2. Resistant to moisture penetration to prevent degradation over time.
  3. Able to accommodate slight movements caused by thermal expansion and contraction without cracking or breaking apart.
  4. Strong enough to secure heavy glass panes or large frames without failure under stress.
  5. Designed for use with specific materials like vinyl, wood, aluminum, or fiberglass without causing damage or improper bonding.
  6. Long-lasting performance that ensures your window remains secure for decades rather than deteriorating after just a few years.

Types of Adhesives Commonly Used

Type Advantages Best Used For
Silicone Sealants Flexible and weather-resistant Vinyl frames; exterior sealing
Polyurethane Caulk Strong adhesion; durable Heavy-duty installations
Acrylic Latex Caulk Easy application; paintable Interior trim sealing
Butyl Rubber Tape Excellent moisture resistance Waterproofing exterior joints

Risks of Using Improper Adhesives

  • Water Damage: Without proper sealing, water can seep into gaps around windows leading to rot or mold growth.
  • Reduced Energy Efficiency: Air leaks caused by poor adhesion increase heating/cooling costs.
  • Safety Hazards: Weak adhesives may compromise structural stability during storms or high winds.
  • Frequent Maintenance Needs: Inferior products degrade faster requiring costly repairs sooner than expected.

Tips for Ensuring Proper Adhesive Use

  1. Consult with certified professionals who have experience working with different types of windows and frames.
  2. Always follow manufacturer recommendations for adhesive compatibility with your specific window material.
  3. Use primers if required before applying certain types of sealants for better adhesion.
  4. Test small areas first to ensure satisfactory results before full application.
  5. Regularly inspect seals post-installation for any signs of wear or failure so issues can be addressed promptly.

Proper adhesive selection is not just a technical detail — it’s a critical factor that directly affects both short-term performance and long-term durability in your window installation project.

Key Factors to Consider for Window Replacement Rockville, MD Companies

Choosing the right window installation company is a critical step in ensuring your project is completed efficiently, safely, and to a high standard of quality. Below are the top factors to evaluate when selecting a window installation company.

1. Reputation and Reviews

A company’s reputation speaks volumes about its reliability and quality of service. Before making a decision:
Check online reviews: Look for reviews on platforms like Google, Yelp, or the Better Business Bureau (BBB).
Ask for references: Request contact information for past clients and inquire about their experiences with the company.
Look at case studies or portfolios: Many companies showcase completed projects, which can provide insight into their craftsmanship.

2. Licensing and Insurance

Always verify that the company you choose has proper licensing and insurance. This protects both you and the workers in case of accidents or damages during installation. Ensure that they carry:
– A valid contractor’s license specific to your state or region.
– General liability insurance to cover property damage.
– Worker’s compensation insurance for their employees.

3. Experience and Expertise

Window installation requires precision, skill, and knowledge of various products and techniques. Consider these factors:
Years in business: Companies with several years of experience are often more adept at handling challenges.
Specializations: Some companies may specialize in specific types of windows, such as energy-efficient options or custom designs.

4. Warranty Options

A reliable window installation company should back its work with warranties on both materials and labor. Key points include:
| Warranty Type | What It Covers | Typical Duration |
|———————–|———————————————————–|—————————–|
| Manufacturer Warranty | Covers defects in materials (e.g., frames, glass) | Varies; often 10–20 years |
| Workmanship Warranty | Covers errors during installation | Typically ranges from 1–5 years |

Ask for written details on all warranties before signing any agreements.

5. Transparent Pricing

Transparency is crucial when it comes to project costs. Avoid surprises by asking for detailed estimates that include: – Cost of materials (windows, adhesives, hardware).
– Labor fees (hourly rates or flat fees).
– Additional charges (disposal fees for old windows).

Request itemized quotes from multiple companies for comparison purposes.

6. Certifications and Training

Certified installers often adhere to higher industry standards compared to those without professional credentials. Look for certifications such as: – EPA Lead-Safe Certification if your home was built before 1978. – Manufacturer-specific certifications showing expertise with certain window brands.

Final Thoughts on Company Selection

Selecting a window installation company requires careful research into their qualifications, reviews, pricing policies, warranties, and professionalism. By evaluating these factors thoroughly, you set yourself up for a stress-free project with superior results tailored specifically to your needs.


Expert Tips for Window Installation Rockville, MD: Reputation and Experience Matter

Professional master at repair and installation of windows, at work Professional master at repair and installation of windows, at work. window installation stock pictures, royalty-free photos & images

A company’s reputation and experience in the industry play a crucial role in determining their ability to deliver high-quality services.

  • Check online reviews:Look at platforms like Google Reviews, Yelp, or the Better Business Bureau (BBB) for customer feedback.
  • Ask for references:A reputable company should be willing to provide references from past clients.
  • Assess years in business:Companies with a long history are often more reliable and have established processes.

Ensure Proper Licensing and Insurance for Replacement Windows Rockville, MD

Working with a licensed and insured window replacement contractor ensures you’re protected during the project.

Documentation Type Why It Matters
Contractor’s License Confirms they meet state or local requirements.
Liability Insurance Protects you from damages that may occur on-site.
Workers’ Compensation Insurance Covers injuries workers may sustain during the project.

Always ask the company to provide proof of these documents before signing any contract.

Explore Top-Quality Window Repair Rockville, MD Services

A trustworthy window replacement company should offer high-quality products suited to your home’s needs.

  • Ask about energy-efficient options like double-pane or triple-pane windows.
  • Inquire about materials available (e. g. , vinyl, wood, aluminum).
  • Review product certifications such as ENERGY STAR ratings.

Companies offering a wide selection of styles and materials demonstrate their ability to meet diverse customer preferences.

Find Affordable Window Glass Replacement Rockville, MD Without Sacrificing Quality

While cost is an important consideration, it should not be the only factor influencing your decision. Cheap services might lead to substandard installations or poor-quality products.

  1. Obtain multiple quotes from different companies.
  2. Look for detailed breakdowns of costs, including labor, materials, and additional fees.
  3. Be wary of unusually low estimates—they may signal hidden costs or inferior workmanship.

Evaluate Customer Service

The level of customer service provided by a window replacement company reflects their professionalism and commitment to quality work.

  • Responsiveness: How quickly do they respond to inquiries?
  • Transparency: Are they upfront about pricing, timelines, and potential challenges?
  • Communication: Do they clearly explain technical details in an understandable way?

Strong communication throughout the process ensures fewer surprises down the road.

  1. Visit showrooms or request product samples.
  2. Avoid high-pressure sales tactics often used by less reputable companies.
  3. Look into financing options if budget constraints are a concern.

Finding a reliable window replacement company requires thorough research and attention to detail but ultimately leads to better results for your home improvement project.

By following these guidelines, you can feel confident selecting a professional team that meets your needs while enhancing both the aesthetic appeal and functionality of your windows.

Why Certification Matters When Selecting a Professional Window Replacement Company

When choosing a window replacement company, certifications are a crucial element to consider. They serve as an assurance of the company’s credibility, professionalism, and adherence to industry standards. Certifications not only help you identify qualified contractors but also protect your investment by ensuring the work is performed with expertise and precision. Below, we’ll explore why certifications matter and how they can influence your decision.

Guarantees Expertise and Training

Certified companies often employ professionals who have undergone rigorous training, ensuring they are knowledgeable about modern installation techniques, advanced tools, and industry best practices.

  • Installation Masters™ Certification: Verifies that installers have been trained according to the latest installation standards.
  • EPA Lead-Safe Certification: Ensures compliance with federal regulations when working on homes built before 1978 that may contain lead-based paint.
  • Manufacturer Certifications: Many manufacturers certify contractors who meet their specific training requirements for installing their products properly (e. g. , Andersen Certified Contractors or Pella Platinum Certified Installers).

By hiring certified professionals, you reduce the risk of mistakes during installation that could lead to energy inefficiencies or structural issues.

Ensures Compliance with Building Codes

Proper window installation must adhere to local building codes and regulations. Certified contractors are well-versed in these requirements and understand how to meet them effectively. This can protect you from legal complications or additional costs down the line related to improper installations.

Key aspects of compliance include:
– Adherence to energy efficiency standards (e. g. , ENERGY STAR® guidelines).
– Proper sealing techniques to prevent water intrusion and air leaks.
– Correct sizing and placement of windows according to structural codes.

Reflects Commitment to Quality

Certification often demonstrates a company’s dedication to maintaining high-quality work standards. By investing in professional accreditations for their team, companies signal their commitment to delivering superior results for every project.

Look for affiliations with reputable industry organizations such as:
The National Fenestration Rating Council (NFRC): Indicates knowledge of energy efficiency ratings for windows and doors.
The American Architectural Manufacturers Association (AAMA): Certifies proficiency in using durable materials that meet performance guidelines.

Offers Better Warranty Coverage

Many manufacturers provide extended warranties only if the installation is completed by certified professionals. This added protection can make a significant difference in your long-term satisfaction with your new windows.

Type of Warranty Certified Installer Benefits Non-Certified Installer Risks
Product Warranty Covers defects if installed correctly May void coverage if errors occur
Labor Warranty Backed by certification programs Typically unavailable
Lifetime Benefits Often transferable with certified work Void upon resale or transfer

Questions To Ask About Certifications

To ensure you’re working with a qualified professional, ask these questions during your consultation:
1. Are your installers certified by any recognized organizations?
2. Can you provide documentation proving your certifications?
3. Have you completed certification-specific training for the products I’ve selected?
4. Do your certifications align with local building code requirements?

By asking these questions upfront, you’ll gain confidence that you’re partnering with experienced professionals who prioritize quality and compliance.

Final Thoughts on Certification Importance

Certifications are more than just credentials; they serve as an indispensable sign of reliability when selecting a window replacement company. They minimize risks while maximizing value by guaranteeing expert craftsmanship, adherence to regulations, and enhanced warranty options—all essential components of a successful window replacement project.

video thumbnail

Why Certification Matters When Selecting a Professional Window Replacement Company

When planning a window replacement project, the qualifications and certifications of the company you choose play a critical role in ensuring high-quality results. Certifications demonstrate that the company has met industry standards and adheres to best practices. Below, we delve into why certifications matter and how to evaluate them when selecting a professional window replacement provider.

The Importance of Certifications

Certifications serve as a testament to the knowledge, skills, and professionalism of a window replacement company. They indicate that the team is trained in proper installation methods and understands how to work with specific products or materials.

  • Compliance with Industry Standards:Certified professionals are more likely to follow industry guidelines for safety, energy efficiency, and durability.
  • Manufacturer-Backed Training:Many manufacturers require installers to attend specialized training programs before they can become certified to work with their products.
  • Warranty Protection:Some manufacturers offer extended warranties only if certified installers handle their products.
  • Improved Workmanship:Certified installers often produce higher-quality work since they stay up-to-date on the latest techniques and tools.

Key Certifications to Look For

Certification Name Description
EPA Lead-Safe Certification Indicates compliance with safety practices when working on homes built before 1978 (to manage lead paint hazards).
Installation Masters® Certification Verifies that an installer has been trained in best practices for window and door installation.
American Architectural Manufacturers Association (AAMA) Recognizes advanced technical expertise in installation techniques for windows and doors.
Energy Star Partner Certification Shows that the company is committed to energy-efficient installations using Energy Star-rated materials.

How to Verify Credentials

  1. Ask for Documentation:Reputable companies should be able to provide proof of their certifications upon request.
  2. Check Manufacturer Websites:Many manufacturers list certified installers or dealers on their websites.
  3. Consult Industry Associations:Organizations like AAMA or Energy Star maintain directories of certified professionals.

The Role of Ongoing Training

Certifications aren’t just one-time achievements; they often require regular renewal or continuing education. This ensures that technicians stay updated on evolving technology, building codes, and installation techniques.

  • Their training programs.
  • Whether their staff attends certification renewal courses.
  • How they keep up with changes in industry standards.

Red Flags When It Comes to Certifications

  • Companies unwilling or unable to provide certification documentation.
  • Outdated certifications without proof of recent renewals.
  • Lack of affiliation with reputable industry organizations.

Final Thoughts on Certification’s Value

By prioritizing certified professionals for your window replacement project, you protect your investment while ensuring superior craftsmanship and adherence to modern standards. Evaluating certifications upfront can save time, money, and frustration down the road while giving you confidence in your decision-making process.

Understanding the Importance of Warranties in Your Window Replacement Rockville, MD Investment

When investing in new windows for your home, warranties play a crucial role in ensuring peace of mind and long-term satisfaction. Selecting the right window replacement company means understanding the warranties they provide and how they protect your investment. A warranty is not just a document; it is a guarantee that reflects the manufacturer’s confidence in their product and the installer’s commitment to quality work. Here are key aspects to consider when evaluating warranties for window replacement.

Types of Warranties

Warranties often vary based on manufacturers, products, and installers.

  • Manufacturer’s Warranty: Covers defects in materials or workmanship of the windows themselves. This typically includes issues like broken glass seals, frame warping, or hardware malfunctions. These warranties can range from limited terms (e. g. , 10 or 20 years) to lifetime coverage.
  • Installation Warranty: Provided by the contractor or company performing the installation work. It covers issues arising from improper installation, such as leaks, drafts, or misaligned windows.
  • Glass Breakage Warranty: Some companies offer coverage specifically for accidental glass breakage beyond normal wear and tear.
  • Transferable Warranty: This type of warranty allows homeowners to transfer coverage to a new owner if the house is sold during the warranty period—adding potential resale value to your home.

Key Questions to Ask About Warranties

Before agreeing to a window replacement project, asking detailed questions about warranty coverage ensures you fully understand what protection you’re receiving.

  1. How long is the warranty period?
  2. What specific components (e. g. , frames, glass seals) are covered?
  3. Are labor costs included in case repairs are needed under warranty?
  4. Is accidental damage covered?
  5. Is there any maintenance required on my part to keep the warranty valid?
  6. Can I transfer this warranty if I sell my home?

Comparing Warranty Terms

Feature Company A Company B Company C
Length of Manufacturer’s Warranty Lifetime 20 Years 15 Years
Installation Coverage 5 Years Lifetime None
Glass Breakage Included Yes No Yes
Transferability Yes No Yes

Red Flags to Watch For

  • Unclear language or vague terms that don’t specify what is covered.
  • Short coverage periods that suggest lack of confidence in product durability.
  • Exclusions that seem unreasonable or overly restrictive (e. g. , voiding a warranty due to common environmental conditions).
  • Companies unwilling to provide written documentation of their warranties.

Importance of Proper Documentation

After selecting your window replacement provider and finalizing your project details, request all warranty information upfront and keep it safely stored with other important home improvement records. A reputable company will always supply clear written documentation explaining terms and conditions.

Taking time to understand warranties before committing ensures that both your financial investment and your home’s comfort are well protected over time—allowing you greater assurance as you move forward with window replacement decisions.

How to Read and Evaluate Customer Testimonials Before Choosing a Window Replacement Service

Customer testimonials are a critical resource when researching window replacement companies. They provide real-world insights into the quality of services, products, and customer satisfaction levels. However, not all testimonials carry the same weight, and understanding how to evaluate them can help you make an informed decision.

Why Customer Testimonials Are Important

Testimonials offer direct feedback from individuals who have already worked with the company.

  • The quality of workmanship:Are customers satisfied with the final installation?
  • Customer service experience:Was the staff professional, courteous, and punctual?
  • Reliability and trustworthiness:Did the company meet deadlines and honor agreements?
  • Long-term satisfaction:Do customers feel their investment was worth it over time?

By reading testimonials critically, you can gauge whether a company aligns with your expectations.

Tips for Evaluating Customer Reviews

  1. Look for Specific Details
    Vague reviews like “Great service! ” or “Highly recommend” don’t provide much information. Instead, prioritize testimonials that detail aspects such as installation timelines, communication during the project, or product durability.
  2. Focus on Patterns
    Look for recurring themes in reviews.
Positive Patterns Negative Patterns
“Great craftsmanship.” “Missed deadlines.”
“Responsive customer service.” “Lack of communication.”
“High-quality windows installed professionally.” “Poor cleanup after installation.”

If multiple customers highlight similar strengths or weaknesses, it could indicate consistent performance levels.

  1. Consider Recency
    Companies evolve over time; employees change, policies get updated, and practices improve (or decline). Prioritize recent reviews to get an accurate picture of current operations.
  2. Check Multiple Platforms
    Don’t rely on just one source of reviews. Look at platforms like Google Reviews, Yelp, Angi (formerly Angie’s List), or Better Business Bureau (BBB) ratings to gather a well-rounded perspective.
  3. Watch for Verified Purchases
    Some companies post fake reviews to boost their ratings artificially. Focus on verified reviews or those that include photos/videos as proof of completed work.

Red Flags in Testimonials

  • Multiple complaints about delays or poor communication.
  • Reports of unexpected costs or hidden fees.
  • Testimonies highlighting improper installations leading to future problems.
  • A large number of overly generic five-star ratings with no details provided.

Using Customer Feedback During Your Selection Process

  1. Create a shortlist of two or three companies with consistently positive feedback.
  2. Reach out directly to ask questions about any concerns raised in reviews.
  3. Request references from recent projects so you can speak directly with previous customers.

Taking these steps ensures that you’ll choose a window replacement service that meets your expectations based on reliable feedback from others’ experiences.

renovation work in an old house and replacing windows renovation work in an old house and replacing windows, building energy efficiency window installation stock pictures, royalty-free photos & images

Step-by-Step Overview of a Professional Window Replacement Process You Should Expect

Replacing windows in your home is a major project that requires attention to detail, professional expertise, and careful planning. Understanding the step-by-step process of a professional window replacement ensures you know what to expect, promotes smooth communication with your contractor, and helps you identify high-quality service.

The first step in any professional window replacement project involves an initial consultation where the contractor assesses your current windows and discusses your goals.
Measuring:Precise measurements are taken to ensure the new windows will fit perfectly.
Discussing Style Options:Contractors provide information on different styles, materials, and energy-efficiency options available.Identifying Issues:Structural or design issues with existing windows (e. g. , water damage or improper sealing) are noted for potential repair work.

Once the assessment is complete, you will work with the contractor to choose materials and design features that align with your preferences and budget.
Material Selection:Options typically include wood, vinyl, aluminum, or fiberglass frames.Glass Types:Choose from single-pane, double-pane, triple-pane glass or specialty options like low-emissivity (Low-E) coatings for greater insulation.Color & Finish:Select frame colors that complement your home’s aesthetic.

Tip: Always confirm whether materials are energy-efficient and meet local building codes.

Before installation begins, contractors take steps to prepare the site for an efficient process:
– Removing blinds, curtains, or nearby furniture to protect them during installation. – Ensuring clear access points for workers around each window area. – Explaining safety measures taken by their team during installation.

This preparation minimizes disruptions while ensuring efficiency during replacement.

On installation day, the old windows are safely removed without damaging surrounding structures like trim or siding. Workers carefully dispose of debris according to environmental regulations when performing this task.

Important Note:If structural issues such as rotting wood or damaged seals are discovered at this stage, additional repairs may be necessary before continuing.

The new windows are then installed using best practices to ensure proper functionality and long-term performance: 1.Positioning & Leveling:New windows are aligned correctly within the frame opening. 2.Sealing:Gaps around the frame are filled using caulking or foam insulation for an airtight seal. 3.Securing Frames:Fasteners anchor frames securely into place without compromising structural integrity.

After securing each window unit firmly in its position professionally trained teams clean surrounding areas thoroughly post-installation making sure no mess remains behind. .

How to Assess the Timeline for Completing Your Window Installation Project

When planning a window installation project, one critical factor is understanding and assessing the timeline for its completion. Properly evaluating this aspect can help you set realistic expectations, avoid unnecessary delays, and ensure the process fits seamlessly into your schedule. Below are key considerations and tips to help you determine an accurate timeline for your window installation project.

Factors That Influence Installation Timelines

Several factors can affect how long it will take to complete a window replacement project.

  • Type of Windows: Standard-sized windows are quicker to replace than custom-designed or specialty windows, which may require additional manufacturing time.
  • Number of Windows: Replacing one or two windows takes significantly less time than replacing an entire home’s worth of windows.
  • Material Availability: If materials like specific glass panes or frame finishes are back-ordered, it may extend the overall duration of the project.
  • Weather Conditions: Inclement weather such as rain, snow, or extreme heat can delay outdoor aspects of installation work.
  • Installation Team Size: Larger crews can often expedite the process compared to smaller teams working on multiple projects simultaneously.

Average Timeframes for Window Installation

Project Type Estimated Timeline
Replacing 1 standard window 1–2 hours
Replacing multiple standard windows in one day 6–10 hours (depending on size/crew)
Installing specialty/custom windows with unique designs 2–4 days

Questions to Ask About Timelines

  1. What is your estimated start date?This helps establish when the crew will begin work after contracts are signed and materials are ordered.
  2. How long does each phase take?Understanding each stage—such as removal, preparation, and new window fitting—can provide clarity on potential bottlenecks.
  3. What could cause delays?Ask contractors about common challenges they’ve encountered in similar projects so you’re prepared for any unexpected hurdles.

Tips for Staying on Schedule

  • Confirm material availability before signing any agreements.
  • Work with experienced professionals who have a proven history of completing jobs promptly.
  • Ensure clear communication between yourself and the contractor throughout all phases of the project.
  • Be flexible with scheduling during busy seasons but firm in expectations for updates if delays arise.

Planning Around Your Timeline

Accurately assessing your timeline is crucial not just from a logistical standpoint but also for minimizing disruptions to daily life. Whether you’re replacing a single window or upgrading every unit in your home, taking time to plan properly will contribute significantly toward achieving a stress-free installation experience.

By factoring in these elements well ahead of time and maintaining open communication with your contractor, you’ll be better equipped to manage both expectations and outcomes effectively during your window replacement journey.

How to Assess the Timeline for Completing Your Window Installation Project

When planning a window installation project, understanding the timeline is crucial. A well-structured timetable ensures you can prepare adequately and minimizes disruption to your daily life. Here’s a guide to assessing the timeline for your window installation project, along with tips to keep things on track.

Typical Timeline for Window Installation

The time it takes to complete a window installation project depends on various factors such as the number of windows being replaced, the type of windows chosen, and the complexity of installation.

Project Phase Estimated Timeframe
Initial Consultation 1-2 days after initial inquiry
Measurement and Inspection 1-3 days
Ordering Custom Windows 2-6 weeks (depending on manufacturer)
Removal of Old Windows 1-2 days
Installing New Windows 1-2 days per 5 windows
Final Adjustments & Clean-Up Same day or next day

Steps to Determine Your Project’s Timeline

  1. How long does it take to schedule an initial consultation?Ensure they can begin promptly after you make contact.
  2. What is the lead time for ordering materials?Custom-made windows typically take longer than standard sizes. Verify if delays are expected during peak seasons or due to supply chain issues.
  3. Will multiple contractors be working concurrently?The number of professionals allocated can affect how quickly work is completed. A larger team may expedite installation for bigger projects.

Factors That Can Impact Installation Time

  • Weather Conditions:Rain, snow, or extreme temperatures may delay outdoor work.
  • Custom Features:Specialty windows require more manufacturing time and careful handling during installation.
  • Structural Issues:If existing frames are damaged or require repairs, this will add time to the process.
  • Permitting Requirements:In some areas, permits might be needed before starting work.

Questions To Ask About Scheduling

  • When will my project start once I commit?
  • Are there any external factors that might delay production or installation?
  • Can I expect regular updates on progress milestones?
  • What happens if unforeseen issues arise mid-project?

Tips for Staying On Schedule

  • Confirm all materials have been ordered before scheduling labor dates.
  • Clear furniture or obstacles near window areas ahead of time to minimize delays during removal and replacement.
  • Maintain open communication with your contractor regarding any changes in availability.

By properly assessing timelines upfront and working collaboratively with your chosen contractor, you can ensure a smooth process from start to finish while meeting your expectations for efficiency and quality workmanship.


Essential Factors to Consider When Replacing Windows in Rockville, MD Homes

Installing a skylight Installing a skylight window installation stock pictures, royalty-free photos & images

Replacing windows in an older home can be an exciting, yet challenging task. Beyond aesthetic benefits, new windows can improve energy efficiency, enhance comfort, and increase property value. However, older homes come with unique considerations that need to be addressed carefully. Below are six essential factors homeowners should evaluate before embarking on a window replacement project.

1. Preservation of Historical Charm

  • Opt for customized window designs that match the original aesthetics.
  • Consider materials like wood or composite that resemble traditional frames.
  • Check if your home is located in a historic district where specific guidelines may dictate window styles and materials.

2. Energy Efficiency Upgrades

  • Double-glazed or triple-glazed windows for improved insulation.
  • Low-E (low emissivity) coatings to minimize heat transfer.
  • Frames made from insulated materials like vinyl or fiberglass.

For long-term savings on heating and cooling costs, look for windows certified by ENERGY STAR®.

3. Structural Integrity of Window Frames

  • Rotting or deteriorated wooden frames.
  • Cracks in masonry or gaps around the window opening.
  • Out-of-square openings caused by settling over time.

Repairing these issues prior to installation ensures a secure fit and prevents future problems such as drafts or leaks.

4. Proper Measurements

Measurement Considerations Why It’s Important
Width & Height Ensures proper sizing of the window unit
Diagonal Measurements Checks if the frame is square
Depth Confirms compatibility with wall thickness

Having professional installers take precise measurements can prevent costly errors during installation.

5. Ventilation Needs

  • Determine which rooms need better air circulation.
  • Choose operable window types like casement or double-hung styles for better functionality.
  • Ensure compliance with local building codes regarding egress requirements in bedrooms or basements.

6. Budget Considerations

  • Request estimates from multiple contractors for comparison.
  • Balance cost against longevity; investing in high-quality materials can reduce maintenance expenses over time.
  • Look into available rebates or tax credits for installing energy-efficient products.

By addressing these six factors thoughtfully, homeowners can ensure their window replacement project enhances both the functionality and beauty of their older home while aligning with modern standards of efficiency and comfort.

Important Safety Tips for Window Replacement Rockville, MD Homeowners Need to Know

Proper window installation requires meticulous planning and attention to safety. Neglecting safety measures can lead to injuries, property damage, or suboptimal results. Below are some essential safety tips to consider before, during, and after installing windows.

Wear the Right Protective Gear for Window Installation Rockville, MD

  • Safety gloves: To protect hands from sharp edges of glass or frames.
  • Safety goggles: To shield your eyes from dust, debris, or accidental impact.
  • Steel-toe boots: To safeguard your feet in case heavy materials are dropped.
  • Dust mask: For protection against inhaling particles when cutting or sanding frames.

Ensure Proper Handling of Glass for Replacement Windows Rockville, MD

  • Always carry glass vertically rather than flat to reduce stress on the pane.
  • Use suction grips or specialized lifting tools for better control.
  • Inspect each pane for cracks or defects before installation.

Securing the Work Area During Window Repair Rockville, MD

  • Remove furniture, rugs, and other obstructions near windows.
  • Place warning signs if working in a high-traffic area.
  • Sweep away debris regularly to prevent slipping.

Additionally, use sturdy ladders or scaffolding for access to elevated areas and ensure they are stable before climbing.

Important Tips for Safe Window Glass Replacement Rockville, MD

  • Read the instruction manuals for all power tools prior to use.
  • Keep tools sharp and well-maintained; dull blades increase risk of accidents.
  • Always cut away from your body when trimming materials like caulk or wood.

Address Weather Conditions

Weather Condition Potential Risk Recommended Action
High winds Glass breakage; tool instability Postpone installation until conditions stabilize
Rain Slippery surfaces Use non-slip mats; wear waterproof gear
Extreme heat Dehydration Take regular breaks; stay hydrated

Working in unfavorable weather can compromise not only safety but also the quality of the installation.

6. Protect Against Falls

  • Use harnesses if required by local building codes.
  • Install guardrails on scaffolds.
  • Never overreach while standing on ladders—move it instead.

Falls are among the most common injuries during construction projects but are entirely preventable with proper precautions.

Final Checklist Before Starting Work

  1. Have you inspected all materials for damage?
  2. Are all necessary permits secured (if applicable)?
  3. Is your team familiar with emergency protocols?
  4. Are worksite hazards minimized?

By following these essential safety tips throughout the process, you’ll ensure not only a successful window replacement but also a safe experience for everyone involved in the project.

installation of plastic windows construction worker sets of metal and plastic window window installation stock pictures, royalty-free photos & images

The Importance of Properly Sealing Windows for Energy Efficiency and Longevity

Properly sealing windows is an essential step in any window installation process. Not only does it ensure that your windows function correctly, but it also enhances energy efficiency and prolongs the lifespan of both the windows and your home. Failing to prioritize sealing can lead to air leaks, water damage, higher utility bills, and a less comfortable living environment. Here’s a detailed look at why sealing your windows matters and how to do it right.

Benefits of Proper Window Sealing

  1. Sealing prevents air leaks around the edges of your windows, reducing drafts.
  2. Well-sealed windows help maintain consistent indoor temperatures, lowering heating and cooling costs.
  3. Energy-efficient homes contribute to reduced carbon footprints.
  4. Eliminates cold spots during winter by blocking outdoor air infiltration.
  5. Reduces heat gain in summer months when paired with appropriate glass types.
  6. A properly sealed window keeps rainwater from seeping into walls or flooring.
  7. Preventing moisture intrusion reduces the chances of mold growth or structural deterioration.
  8. Frames are protected from weather-related wear-and-tear when sealed effectively.
  9. Prolongs the life of caulking and insulation materials used around window openings.

Common Signs Your Windows Are Poorly Sealed

  • Noticeable drafts around window edges.
  • Increased energy bills without significant changes in household habits.
  • Condensation between glass panes or along the interior sides of windows.
  • Peeling paint or soft wooden frames near window areas caused by water damage.

Steps for Properly Sealing Windows

  1. Look for gaps, cracks, or warping that may compromise the seal’s effectiveness.
  2. Repair any frame damage before proceeding with sealing.
  3. Choose High-Quality Sealants | Type | Best For | Pros | Cons | |——|———-|——|——| | Silicone Caulk | Outdoor use; glass-to-frame seals | Highly weather-resistant; long-lasting | Harder to apply | | Acrylic Latex Caulk | Interior use; small cracks/gaps | Easy to use; paintable surface after drying | Less durable outdoors |
  4. Use a damp cloth or cleaning solution to remove dirt, dust, or grease on surfaces where sealant will be applied.
  5. Allow surfaces to dry completely for better adhesion.
  6. Use a caulking gun for even application along window edges.
  7. Smooth out excess caulk using a caulking tool or your finger for neat results.
  8. Test for Effectiveness Post-Sealing After curing (typically 24–48 hours), check for leaks using:
    • A lit candle near sealed areas (flickering indicates air movement).
    • Infrared thermometers to identify cold spots in winter months.

Maintenance Tips for Long-Term Performance

  1. Inspect seals annually for wear-and-tear such as cracking or peeling.
  2. Reapply sealant as needed — especially after severe weather like heavy rains or extreme temperature fluctuations.
  3. Check weatherstripping around operable windows regularly and replace damaged sections promptly.

Investing time into properly sealing your home’s windows not only enhances their performance but also delivers measurable savings on energy costs over time. By following best practices during installation and performing regular maintenance checks, you can enjoy added comfort in every season while protecting your home’s structural integrity over the years ahead—making this step an integral part of any successful project involving new window installations or replacements.

Upgrading Your Home with High-Quality, Better Windows for Superior Performance

Investing in high-quality windows is a significant step toward improving your home’s overall comfort, energy efficiency, and aesthetic appeal. The right windows can elevate the functionality of your home while offering long-term savings. Below, we’ll explore how upgrading to better windows can enhance your living space and provide factors to consider when selecting the best options for your needs.

Benefits of High-Quality Windows

  • Improved Energy Efficiency:
    High-performance windows are designed to reduce heat transfer and improve insulation. Look for features such as double or triple glazing and low-E (low-emissivity) coatings.
  • Enhanced Curb Appeal:
    Upgraded windows can transform the exterior aesthetic of your home with modern designs, materials, and finishes.
  • Noise Reduction:
    Premium-grade windows often feature soundproofing technology that minimizes outdoor noise for a quieter indoor environment.
  • Increased Home Value:
    Replacing old or inefficient windows with high-quality options may boost the resale value of your property.
  • Durability and Longevity:
    Quality materials like fiberglass or vinyl ensure that windows resist weathering over time.

Features to Look for in Superior Windows

Feature Description Benefit
Energy Efficiency Rating Look for ENERGY STAR certified products with a low U-factor and SHGC (solar heat gain coefficient). Reduced energy bills
Frame Material Choose durable materials such as vinyl, wood-clad, or fiberglass that suit your climate. Longer lifespan
Glazing Options Opt for double or triple panes with inert gas fills like argon or krypton between layers. Better insulation
Low-E Coating This invisible layer reflects infrared light while allowing visible light into the home. Keeps interiors comfortable
Weatherstripping & Seals Ensure tight seals around frames that prevent air leaks and moisture infiltration. Improved durability

Tips for Choosing Windows That Match Your Home’s Style

  1. For traditional homes (e.g., Victorian or Colonial styles), consider double-hung or casement windows with wood frames.
  2. Modern properties often benefit from sleek aluminum-framed picture or sliding glass windows.
  3. For rustic homes like farmhouses, choose grid-style patterns on larger panes to maintain charm while enjoying better views.

Cost vs Value: Is It Worth It?

  • Lower utility costs due to improved thermal efficiency
  • Reduced maintenance thanks to advanced materials
  • Fewer replacements needed over time

Although premium options require an upfront investment, their ability to provide superior performance makes them an excellent choice for homeowners seeking long-term value.

By upgrading to high-quality modern windows tailored to both style and function, you can enjoy a more comfortable living environment while ensuring durability and future energy savings.

Steps to Prepare Your Window Frame for a Seamless Replacement Process

Properly preparing your window frame is essential for ensuring a successful and seamless window replacement process. Without adequate preparation, you might face issues such as improper fitting, air leaks, or reduced energy efficiency. Here’s a detailed guide on the steps to get your window frame ready for replacement.

1. Assess the Existing Window Frame

Before starting any work, inspect the current state of your window frame. Look for:
Rot or Damage: Wooden frames may have rotted sections that need repair or replacement.
Warping: Ensure that the frame is not warped or misaligned. A crooked frame can make proper installation difficult.
Pest Damage: Check for signs of termites or other pests that could compromise the structure’s integrity.

If any significant issues are identified, repair or replace the damaged areas before moving forward.

2. Remove Old Windows and Residual Materials

Carefully remove the old windowpane and components to avoid damaging the surrounding structure. This includes:
Window Sash and Panes: Detach these with care to minimize breakage risks.
Old Caulking or Sealant: Use a scraper tool to remove old adhesive materials around the edges of the frame. – Debris Build-up: Clean out dirt, dust, and debris from within and around the frame area.

Use drop cloths around your work area to collect debris and prevent unnecessary mess.

3. Measure Accurately for Replacement Windows

Accurate measurements are critical when preparing your frame for new windows to ensure a perfect fit. Follow these steps: – Measure both height and width at three points (top, middle, bottom). – Use the smallest measurement as your base dimension. – Verify diagonal measurements to ensure that the opening is square.

Measurement Dimension (inches)
Width X
Height X
Diagonal X

4. Inspect Insulation Around The Frame

Old insulation can compromise energy efficiency if left unaddressed during window installation. Carefully remove outdated or crumbling insulation materials from around the opening.

For re-insulating after prep: – Use spray foam insulation around gaps. – Ensure it doesn’t expand excessively, which might affect window alignment.

5. Sand Down Imperfections on Wooden Frames

If you’re working with wooden frames, sanding down rough spots ensures smooth installation: – Start with medium-grit sandpaper (80–120 grit).
– Finish with fine-grit sandpaper (200+ grit) for smoothness. Clean off dust before proceeding further—this helps new sealants adhere better during installation.

6. Install Flashing Tape (If Needed)

Flashing tape acts as an additional protective barrier against water infiltration: 1. Apply self-adhering flashing tape along all four sides of your exterior sill where new windows will sit. 2. Overlap corners slightly so there are no gaps in coverage. 3. Press down firmly using a roller tool or hand pressure for maximum adhesion.

This step is especially critical in areas prone to heavy rain or humidity as it prevents moisture-related damage over time.

Key Tips For Success

To ensure smooth preparation: 1. Work systematically—completing one step fully before moving onto another. 2. Keep tools like pry bars, scrapers, measuring tape, levelers handy at all times. 3. Double-check dimensions twice before ordering custom windows if replacements aren’t standard sizes.

By following these preparation steps thoroughly, your project will run more efficiently while avoiding costly mistakes during installation itself.

Why Choosing Certified Professional Installers Ensures a Successful Window Installation

When it comes to replacing or installing new windows, hiring certified professional installers is one of the most critical decisions a homeowner can make. Proper installation directly impacts the performance, durability, and energy efficiency of your windows. Below, we’ll explore the reasons why certified professionals are essential for ensuring a smooth and successful window installation process.

Expertise and Knowledge

  • Material Compatibility: Understanding which materials work best with your home’s structure.
  • Building Codes: Adhering to local building codes and regulations to ensure compliance.
  • Advanced Install Techniques: Implementing advanced methods that maximize efficiency and minimize potential issues like air leaks or water damage.

Their specialized knowledge reduces the risk of costly errors, saving you time and money in the long term.

Proper Tools and Equipment

  • Precisely measure window openings for a custom fit
  • Securely install frames without damaging surrounding materials
  • Ensure proper sealing techniques for improved energy efficiency

A lack of proper tools often results in subpar installations, leading to premature wear or reduced functionality.

Warranty Protection

  1. Protect your investment with manufacturer-backed guarantees.
  2. Gain peace of mind knowing that workmanship warranties may also cover labor-related issues.

Attempting DIY installation without certification can void these warranties, leaving you liable for potential repair costs.

Enhanced Safety Standards

  • Using protective gear during the installation process
  • Securing windows properly to avoid accidents
  • Handling heavy materials without compromising structural integrity

These precautions help safeguard both your property and the workers involved.

Time Efficiency

  • Uneven window frames
  • Hidden structural issues (e.g., rot or mold)
  • Custom-shaped or oversized windows

By delegating this task to experts, homeowners save hours—or even days—on what could be an overwhelming DIY project.

Cost-effective Results

Impact of Professional Installation Cost-Saving Advantages
Energy-efficient seals Lower monthly utility bills
Reduced need for repairs Avoiding repeat service calls
Longevity of windows Delayed need for future replacements

These long-term savings make professional installation a more economical choice over time.

Customized Recommendations

  1. The best window styles to suit your home’s design
  2. Insulation improvements for better energy performance
  3. Solutions for homes in extreme climates (e.g., double-glazed glass or UV-resistant coatings)

This level of customization ensures both aesthetic appeal and functional benefits tailored specifically to your needs.

Choosing certified professional installers ensures that every aspect of your window replacement project—from preparation through final adjustments—meets industry standards. This decision ultimately enhances quality, safety, efficiency, and overall satisfaction with your new windows’ performance over time.

Construction worker installing window in house Construction worker installing window in a new house window installation stock pictures, royalty-free photos & images

How to Protect Your Home by Boarding Up Windows Before Installation Projects

When preparing for a window installation project, protecting your home is essential to avoid potential damage and ensure a smooth process. One crucial step is boarding up your windows before the installation begins. This task not only safeguards your property but also protects the interior of your home from weather conditions, debris, and security risks. Below is a guide on how and why to board up windows effectively before starting an installation project.

Why Boarding Up Windows Is Necessary

  1. Weather Protection: Open or exposed window spaces can allow rain, wind, or extreme temperatures to enter your home during the installation process.
  2. Debris Prevention: During construction or renovation, dust and debris can easily infiltrate open areas if they aren’t properly secured.
  3. Enhanced Security: Boarding up windows prevents unauthorized access to your property while openings are exposed.
  4. Safety Precautions: It minimizes risks of accidents caused by broken glass or other hazards.

Tools and Materials Needed

To board up your windows effectively, you’ll need the following materials: – Plywood sheets (preferably ½ inch thick) – Measuring tape – Saw for cutting plywood – Drill or hammer – Screws or nails – Safety goggles – Ladder (if necessary)

Investing in good-quality materials ensures durability throughout the project.

Tool/Material Purpose
Plywood sheets Covers and protects window openings
Measuring tape Ensures precise measurements
Drill/hammer Secures plywood in place
Screws/nails Fastens plywood securely

Step-by-Step Guide to Boarding Up Windows

  1. Measure the Window Openings Use a measuring tape to determine the dimensions of each window that will be replaced. Add an additional inch on all sides to ensure full coverage when cutting plywood.
  2. Cut Plywood Sheets Using these measurements, cut plywood sheets accordingly with a saw. Be sure each sheet fits neatly over its respective window opening.
  3. Attach Plywood Securely Position the plywood against the exterior frame of each window opening and secure it with screws or nails using a drill or hammer.
  4. Inspect for Gaps Check for gaps between the edges of the plywood and the wall frame where air, water, or pests could enter. If gaps exist, use weather-resistant sealant to close them temporarily.
  5. Reinforce Larger Windows For larger openings such as patio doors or picture windows, consider additional reinforcement by adding horizontal wooden braces across the board’s surface for extra stability.

Tips for Success

  • Always wear safety goggles when cutting wood or drilling.
  • Work with a partner if ladder use is required.
  • Label each piece of plywood after cutting so you know which piece corresponds to which opening.
  • Avoid using adhesive tapes as they may leave residue on surfaces after removal.

After Installation

Once your new windows are installed successfully, remove any boards carefully without damaging surrounding structures. Store reusable materials such as screws and wood panels for future projects if they remain in good condition.

By boarding up your windows before starting an installation project, you take proactive steps toward ensuring safety while protecting structural elements of your home from unwanted exposure or damage during renovations.

Allowing the Glazing Process to Fully Dry: A Crucial Step in Window Installation

When it comes to window installation, ensuring that every step is completed with precision can significantly impact the functionality and longevity of your windows. One often-overlooked yet essential phase of the process is allowing the glazing to fully dry. Proper drying of the glazing not only ensures a clean and secure seal but also prevents future problems such as leaks, drafts, or moisture damage. Below, we’ll break down why this step is crucial and what you can do to ensure optimal results.

What Is Window Glazing?

Glazing refers to the application of a specialized compound or material used to seal and secure glass panes into their frames. This compound forms a barrier that minimizes air and moisture infiltration while enhancing durability. Whether you’re replacing old windows or installing new ones, glazing plays a critical role in achieving a long-lasting bond between the glass and frame.

Why Is Allowing Glazing to Fully Dry Important?

  • Compromised Seal Integrity: If not allowed sufficient time to cure, glazing may fail to adhere properly, leaving gaps for air or water intrusion.
  • Moisture Problems: Improperly dried glazing can result in water seepage over time, leading to rot or mold around your windows.
  • Reduced Energy Efficiency: Without a proper seal, your windows may allow drafts that increase heating and cooling costs.
  • Shortened Lifespan: Poorly dried glazing may crack or deteriorate prematurely, requiring frequent repairs or replacements.

Factors That Affect Drying Time

  1. Oil-based compounds typically take longer (7-14 days) due to their dense consistency.
  2. Latex-based formulas dry faster (24-48 hours) but may sacrifice some durability.
  3. Warm temperatures and low humidity promote faster drying.
  4. Cold or damp conditions slow curing times significantly.
  5. Thicker layers require more time for complete drying compared to thinner applications.
  6. Adequate airflow helps speed up curing by allowing moisture from the compound to evaporate more efficiently.

Best Practices for Allowing Proper Drying

  • Schedule Around Weather Conditions Choose mild days with moderate humidity levels for optimal results when applying glazing outdoors.
  • Apply Thin Layers Avoid overloading compounds during application; instead, use even and thin layers for quicker drying times.
  • Ensure Proper Ventilation Keep work areas well ventilated by opening nearby doors or windows if working indoors.
  • Avoid Handling Prematurely Refrain from touching or testing the glaze until you’re certain it has cured fully according to manufacturer guidelines.

Table: Typical Drying Times for Different Glazing Types

Type of Glazing Approximate Drying Time Ideal Conditions
Oil-Based 7–14 Days Warm temperatures; low humidity
Latex-Based 24–48 Hours Moderate temps; proper air circulation

Allowing sufficient time for your window glazing compound to dry completely might seem like an inconvenience initially but will save you from costly repairs down the line. By ensuring this critical step is handled correctly, you’re investing in energy-efficient and durable windows that will serve your home well for years ahead.


Choosing Windows Rockville, MD: DIY vs Professional Installation for the Best Results

Hands Applying Weather Seal Caulk to Window Frame window installation stock pictures, royalty-free photos & images

Replacing a window is a critical home improvement task that can significantly enhance energy efficiency, aesthetics, and property value. However, deciding whether to embark on this project as a do-it-yourself (DIY) endeavor or hire professional installers can be challenging. Below, we explore the key differences between these two options to help you make an informed decision.

Pros and Cons of DIY Replacement Windows Rockville, MD

Taking on a DIY window replacement can be appealing for homeowners who enjoy hands-on projects. However, it comes with its own set of advantages and drawbacks.

Pros of DIY:

  • Cost Savings: By eliminating labor costs, you may save money upfront.
  • Schedule Flexibility: You can work at your own pace and fit the project into your schedule.
  • Skill Development: Completing the project yourself allows you to learn new skills and gain confidence in home improvements.

Cons of DIY:

  • Time-Consuming: Without prior experience, the process might take significantly longer than anticipated.
  • Risk of Errors: Incorrect installation may lead to air leaks, water damage, or reduced energy efficiency.
  • Lack of Warranty: Most manufacturers’ warranties require professional installation for coverage.

Comprehensive Guide to Window Repair Rockville, MD: Pros and Cons

Hiring professionals ensures that your windows are installed with precision and expertise. Their experience often results in high-quality outcomes while saving you time and effort.

Pros of Professional Installation:

  • Expertise: Professionals have the knowledge to handle unique challenges during installation.
  • Efficiency: With proper tools and experience, they complete the job faster without compromising quality.
  • Warranty Protection: Many professional services offer both labor warranties alongside manufacturer warranties.
  • Safety Compliance: Experts follow building codes and safety regulations to prevent long-term issues.

Cons of Professional Installation:

  • Higher Cost: Labor fees might make this option more expensive upfront compared to DIY.
  • Scheduling Dependence: You’ll need to coordinate schedules with installers, which may mean waiting for availability.

Comprehensive Comparison Table for Window Glass Replacement Rockville, MD

Factor DIY Installation Professional Installation
Cost Lower (no labor fees) Higher (due to labor costs)
Time Investment Longer Shorter
Skill Requirement High (requires tools & expertise) Minimal (handled by experts)
Risk Level Higher Lower
Warranty Often voided without pros Typically included

Key Considerations When Deciding

  1. If budget constraints are your main concern, DIY could be an option if you’re confident in your skills.
  2. However, consider potential long-term expenses if errors occur during installation.
  3. Have you successfully completed similar projects? If not, professional installation may prevent costly mistakes.
  4. Complex window types (e.g., bay windows or custom designs) are often better suited for professionals due to their intricate nature.
  5. Assess whether you have enough time available for preparation and execution without rushing the process.
  6. If maintaining warranty coverage is vital for protecting your investment, hiring professionals is usually necessary.

By thoroughly evaluating these factors alongside the pros and cons outlined above, you’ll be better equipped to choose between DIY or professional window installation methods that suit your needs best.

What to Expect During a Window Replacement in Rockville, MD

Choosing professional window installation ensures that your new windows are installed correctly, efficiently, and safely. Understanding what to expect during this process can help you prepare and feel confident in the work being done. Below is a detailed overview of the typical steps involved in professional window installation.

Initial Assessment and Consultation

The process often begins with a consultation where an installer will:
– Measure the dimensions of your windows accurately.
– Assess the condition of your current windows and frames.
– Discuss options for window styles, materials, and performance features based on your needs and preferences.
– Provide a detailed estimate outlining labor costs, materials required, and project timelines.

This step ensures that all aspects of the project are planned carefully to avoid any surprises during installation.

Preparing Your Home for Installation

On installation day, professionals take special care to protect your home by:
– Covering nearby furniture and floors with drop cloths or protective sheets.
– Removing window treatments such as curtains or blinds (if not done beforehand).
– Ensuring proper access to work areas both inside and outside your home.

This preparation minimizes dust, debris, or accidental damage during the replacement process.

Removal of Old Windows

  1. Loosen Any Seals: Carefully cut through caulking or adhesives holding the old window in place.
  2. Detach Fasteners: Remove screws or nails securing the frame.
  3. Extract Frames Safely: Lift out old frames without cracking glass or damaging nearby trim.

Proper removal reduces potential structural issues later on.

Installation of New Windows

  1. Inspect Frames: Ensure existing openings are free from rot, mold, or warping.
  2. Apply Weatherproofing Materials: Add flashing tape or sealant for insulation and moisture resistance.
  3. Position Windows Accurately: Place each window into its opening while ensuring it is perfectly level.
  4. Secure Frames: Fasten windows using screws or nails as per manufacturer guidelines.
  5. Seal Gaps: Apply high-quality caulk around edges for airtight insulation.

This attention to detail ensures optimal energy efficiency and durability for years to come.

Post-Installation Inspection

Once all windows are installed, professionals perform thorough inspections such as:
– Checking for air leaks around edges using tools like smoke pencils. – Ensuring smooth operation of sashes (opening/closing mechanisms). – Testing locks and hardware for functionality.

Installers will also clean up any construction waste such as broken glass, old frames, or packaging materials before leaving your property.

Benefits of Choosing Professional Installation

Benefit Why It Matters
Precise Measurements Reduces risks of improper fitting
Quality Materials & Tools Ensures long-lasting results
Warranty Coverage Adds peace of mind post-installation
Enhanced Energy Efficiency Lowers utility bills over time

Professional installation saves homeowners from common mistakes often associated with DIY projects while ensuring compliance with local building codes.

Understanding what happens during professional window installation gives you confidence in making informed decisions about replacing your home’s windows effectively.

Top Benefits of Hiring a Professional for Your Window Replacement

Replacing windows is a significant home improvement task that can greatly enhance the visual appeal, energy efficiency, and overall value of your property. While some homeowners may consider tackling this project on their own, hiring a professional for window replacement offers numerous advantages. Below are the top benefits of choosing professional installation services.

Expertise and Precision

  • Proper Measurements: Accurate measurements are critical for a perfect fit. Professionals take precise dimensions to prevent issues like drafts or water leaks.
  • Seamless Installation: They follow specific techniques to securely install windows without damaging the surrounding structure.
  • Problem-Solving Skills: Experts are adept at identifying and addressing potential challenges, such as uneven frames or structural concerns.

Without professional knowledge, even minor mistakes can lead to costly repairs later.

Superior Materials and Tools

Materials/Tools Why They Matter
Premium sealants and caulk Ensure proper insulation and weatherproofing
Specialized equipment Provides precise cuts and reduces installation time
Energy-efficient windows Certified products with better warranties

Investing in durable materials through professionals leads to long-term savings on maintenance and energy costs.

Time Efficiency

  • Streamlined processes developed through experience.
  • Access to an installation team rather than working solo.
  • The ability to handle unexpected issues without delays.

For homeowners with busy schedules, saving time is often one of the most compelling reasons to rely on experts.

Enhanced Safety Standards

  • Proper use of personal protective equipment (PPE).
  • Techniques for safely lifting heavy glass panes.
  • Compliance with local building codes and regulations.

By hiring professionals, you reduce not only safety risks but also liability concerns.

Warranty Protection

  1. Coverage for damaged parts or hardware malfunction.
  2. Assurance against poor craftsmanship.
  3. Long-term support if problems arise after installation.

DIY projects typically do not include such protections, leaving homeowners responsible for repair expenses down the line.

Improved Home Value

  • Enhanced curb appeal with expertly installed windows.
  • Increased energy efficiency resulting in reduced utility bills.
  • A positive impression on prospective buyers during resale evaluations.

According to industry reports, properly installed energy-efficient windows can deliver up to a 78% return on investment (ROI).

Opting for professional window installation delivers far-reaching benefits beyond just functionality—it saves time, protects your property from potential damage, boosts energy efficiency, provides warranty coverage, enhances safety measures, and increases overall home value. This approach ensures that your project is completed reliably while allowing you peace of mind throughout every step of the process.

Worker is installing a window sill. Worker is installing a window sill on a polyurethane foam. window installation stock pictures, royalty-free photos & images

Time-Efficient Window Replacement: Save Time with Expert Installers

Replacing windows in your home can be a time-intensive project, especially if you’re tackling it for the first time. While DIY window replacement might seem like a cost-saving idea at first glance, the time investment and potential setbacks can quickly offset those savings. Hiring expert installers not only ensures professional results but also significantly reduces the time required to complete the project. Let’s explore why expert installers are a time-efficient choice for window replacement.

The Efficiency of Experience

Professional window installers bring years of experience and training to every project. This expertise allows them to handle unexpected challenges, such as uneven window frames or custom-sized windows, without delays. Their knowledge of tools, techniques, and materials ensures that each step of the installation process is completed efficiently.

Key advantages of their experience include:
Quick problem-solving: Professionals can adapt to issues like structural irregularities or damaged frames without halting progress. – Streamlined processes: Installers follow established workflows, reducing downtime between tasks. – Specialized tools: Experts use industry-grade tools for precise measurements and faster installations that aren’t typically available in a DIY setting.

Avoiding Common Time-Wasters in DIY

While many homeowners attempt DIY window replacements to save money, they often encounter obstacles that lead to lengthy delays. Some common challenges include:
– Misjudging measurements, resulting in improperly sized windows. – Lack of familiarity with installation techniques. – Dealing with unforeseen damage to surrounding walls or trim. – Making multiple trips to purchase additional supplies or tools.

With professional assistance, these issues are avoided altogether.

Faster Turnaround for Larger Projects

For homes requiring multiple window replacements, hiring professionals can be especially beneficial. A team of skilled installers works collaboratively to replace several windows simultaneously or sequentially within an organized schedule. This approach can dramatically shorten the timeline compared to tackling one window at a time on your own.

Project Scope DIY Timeline Professional Timeline
Single Window 6–8+ hours (varies) 2–3 hours
5–10 Windows Several weekends 1–2 days
Whole Home Weeks/months 3–5 days

The Value of Minimal Disruption

Replacing windows disrupts your daily routine—furniture needs moving, rooms become temporarily unusable, and outdoor work areas may need preparation. Professional installers prioritize minimizing disruptions by working efficiently and cleaning up thoroughly after completing their tasks.

By relying on their expertise:
– Your home remains functional throughout most of the process. – Downtime is reduced as professionals coordinate schedules effectively. – Clean-up from debris or old materials is handled efficiently.

Why Expert Installers Save You More Than Just Time

Beyond saving time during installation itself, professional services often help you avoid costly mistakes down the road. Poorly installed windows can lead to air leaks, higher energy bills, or water damage—all requiring additional repairs later on. Skilled professionals ensure proper seals and alignment from the start so you won’t have these concerns in the future.

When evaluating your options for replacing windows efficiently while maintaining high-quality results, trusting experienced installers allows you to save valuable time while enjoying peace of mind about long-term performance benefits.

Essential Tips for Window Installation in Rockville, MD Before Starting a DIY Project

Replacing a window can be a rewarding project for homeowners who enjoy tackling DIY tasks. However, before embarking on such a project, careful planning and consideration are essential to ensure the best results. Below are some key factors to evaluate before starting a DIY window replacement.

Assess Your Skill Level and Experience

Window replacement is not a beginner-level home improvement task. It requires precision, understanding of tools, and familiarity with construction techniques. Ask yourself the following:
– Have you successfully completed similar carpentry or home repair projects?
– Are you comfortable using tools like a level, caulk gun, pry bar, and power drill?
– Do you understand how to measure accurately for new windows?

If these tasks feel beyond your expertise, it may be worth hiring a professional.

Gather the Right Tools

Having the correct tools on hand is non-negotiable for replacing windows effectively. Common tools include:
Measuring tape – Essential for accurate dimensions of the opening and replacement window.
Level – Ensures proper alignment of the window frame during installation.
Utility knife – Useful for trimming or removing old caulk or weather stripping.
Hammer or pry bar – Required to remove existing frames or nails holding old components in place.
Sealant (caulk) gun – Helps prevent air leaks by sealing gaps after installation.

Investing in quality tools will make your work more efficient and professional-looking.

Understand Local Building Codes

Many communities have building codes that regulate window installation to ensure safety and energy efficiency standards are met. For instance, certain areas may require tempered glass near doors or strict U-value ratings for energy compliance. Before starting your project:
1. Research local building requirements related to windows. 2. Ensure any permits needed are obtained. 3. Confirm that your chosen materials comply with energy-efficiency standards like ENERGY STAR certifications.

Failing to meet these regulations could result in costly fines or having to redo the project.

Evaluate Costs vs Savings

Expense Type DIY Costs Professional Costs
Tools and Equipment Upfront cost of purchasing tools Included in service fees
Material Selection Risk of buying incorrect materials Expertise ensures proper selection
Time Investment Several hours (or days) Efficient completion by experts

In many cases, mistakes made during DIY installations result in increased long-term costs due to poor sealing or misaligned frames leading to drafts and inefficiencies.

Recognize Potential Risks

Attempting window replacement without sufficient knowledge can lead to complications such as:
– Damaging surrounding walls or trim during removal of old windows.
– Improper sealing causing drafts or water leaks over time. – Void warranties if new windows aren’t installed according to manufacturer instructions.

It’s important to weigh these risks against potential savings when deciding whether DIY is right for you.

Clearly understanding these considerations will help set realistic expectations before starting your DIY project and minimize challenges along the way while striving for optimal results in your home improvement efforts.

Making the Best Choice: Deciding Between DIY and Professional Window Installation

Choosing between a DIY window installation and hiring a professional can be a significant decision for homeowners. Each option has its own set of advantages and challenges. To make an informed choice, it’s essential to evaluate your goals, budget, skill level, and timeline. Below is an in-depth look at the key factors to consider when deciding between these two approaches.

Advantages of DIY Window Installation

  • Cost Savings:
    Hiring professionals can be expensive. By opting for DIY installation, you eliminate labor costs, which can be a significant portion of the overall expense.
  • Flexibility:
    You have complete control over your schedule and process. This allows you to work at your own pace instead of adhering to a contractor’s availability.
  • Sense of Accomplishment:
    Successfully installing your own windows can bring a sense of pride in completing the project with your own skills and effort.

However, keep in mind that improper installation may lead to higher long-term costs due to energy inefficiency or water damage.

Challenges with DIY Installation

  • Skill Requirements:
    Window installation requires precision. Poorly installed windows may result in drafts, leaks, or structural damage over time if not done correctly.
  • Specialized Tools:
    Installing windows often involves tools such as shims, caulking guns, pry bars, levels, and more. Purchasing or renting these tools could offset initial savings.
  • Time Intensive:
    For inexperienced individuals, installing even one window can take considerably longer than expected.

Benefits of Professional Window Installation

  • Expertise:
    Professionals have years of experience handling various types of windows across different homes and settings. They understand how to mitigate potential issues during installation.
  • Warranty Guarantees:
    Many professional installers provide warranties on their work as well as on the products being installed—giving you peace of mind should something go wrong in the future.
  • Efficiency:
    Experienced teams often complete projects quickly without compromising quality—a key benefit if you’re replacing multiple windows or working against tight deadlines.
Aspect DIY Professional Installation
Upfront Cost Lower Higher
Skill Level Required High Low
Warranty Rare Common
Time Commitment Higher Lower
Risk of Errors Greater Minimal

Factors to Consider Before Making Your Decision

  1. Do I have prior experience or enough knowledge about window replacement?
  2. Can I invest in specialized tools required for precise installation?
  3. Is my home’s structural safety worth risking potential errors?
  4. What is my budget? Does it account for possible rework costs if I choose DIY?

By answering these questions honestly and weighing them against your priorities—whether it’s cost savings or guaranteed quality—you’ll be better equipped to make an informed decision regarding your next window replacement project.